How to Remove Batteries from Meta Quest 2 Controllers Safely
Removing batteries from your Meta Quest 2 controllers is a simple but important task. Whether you need to replace dead batteries, store your device for a long time, or troubleshoot connectivity issues, knowing the right way to take out the batteries can save you time and prevent damage.
Many new users are unsure about opening the controllers, and some worry about breaking the battery cover. This guide will help you remove the batteries step by step, explain why it matters, and share tips that even many experienced users miss.
Why You Need To Remove Batteries From Meta Quest 2 Controllers
People remove batteries from their Meta Quest 2 controllers for many reasons. Battery replacement is the most common. The controllers use one AA battery each, and when the power runs low, you’ll notice tracking problems or see a low battery warning.
Removing the battery is also important before you store the headset for weeks or months. Batteries can leak over time, which may damage the inside of your controller. If your controller freezes or will not connect, a battery reset is a simple way to troubleshoot.
Some users also want to use rechargeable batteries to save money and reduce waste. To switch to rechargeable AA batteries, you must remove the old ones first. Finally, when cleaning or repairing your controllers, it is safest to take out the batteries to avoid short circuits.
Understanding Meta Quest 2 Controller Battery Design
The Meta Quest 2 controller is designed for easy battery replacement, but its cover is often hard for first-time users to open. Each controller (left and right) has a single AA battery slot. The battery compartment is hidden under a sliding cover on the grip.
Unlike some devices, the battery is not sealed or screwed in. You do not need any tools to open the battery compartment—just a careful hand.
Inside, the battery is held by two metal contacts, one at each end. The compartment is sized for standard AA batteries, so both alkaline and rechargeable AA types fit. The cover is designed to stay secure during gameplay but can be pushed open with gentle force.
Battery Life And Replacement Frequency
The average AA battery in a Meta Quest 2 controller lasts about 30-50 hours of playtime, depending on the brand and whether you use vibration or haptic feedback features often. Rechargeable AA batteries may last a little less per charge, but they can be reused hundreds of times.
Here is a quick comparison of battery types for the Meta Quest 2 controller:
| Type | Typical Playtime | Rechargeable | Estimated Cost per Year (2 controllers) |
|---|---|---|---|
| Alkaline AA | 30–50 hours | No | $40–$60 |
| NiMH Rechargeable AA | 25–40 hours | Yes | $10–$20 (after initial purchase) |
| Lithium AA | 50–70 hours | No | $60–$90 |
What You’ll Need Before Removing The Batteries
To safely remove the batteries from your Meta Quest 2 controllers, you do not need special tools. However, a few items can make the process easier, especially if the cover is stuck or if the battery is hard to grip:
- Clean hands (to avoid oil or dirt on contacts)
- Soft cloth (optional, for wiping)
- Plastic pry tool (rarely needed, for stuck covers)
- Fresh AA batteries (for replacement)
- Rechargeable AA batteries (if you want to switch)
You do not need a screwdriver or any metal tools. Avoid using sharp objects, as they can damage the controller.
Step-by-step Guide: How To Remove Batteries From Meta Quest 2 Controllers
Follow these steps to safely remove and replace the batteries in your Meta Quest 2 controllers.
1. Power Off The Headset
While not required, powering off your Meta Quest 2 headset before removing controller batteries is a good habit. This prevents accidental inputs and reduces the risk of syncing problems.
2. Hold The Controller Properly
Hold the controller with the grip facing up. The battery cover is the long, curved panel along the handle (not the tracking ring). You’ll see a small arrow or indentation near the top end of the grip—this marks where the cover slides off.
3. Slide The Battery Cover
Press your thumb on the textured area near the arrow. Push gently in the direction of the arrow—away from the buttons, toward the base of the handle. The cover should slide about half an inch and then lift off.
Common mistake: Many people try to pull or pry the cover straight off, but it must be slid first. Forcing it can break the tabs.
4. Remove The Battery
Once the cover is off, you’ll see the AA battery inside. The battery sits snugly in the compartment, with the positive (+) end pointing toward the top of the controller.
To remove it:
- Press lightly on the negative (flat) end to pop the positive end up.
- Pull the battery out with your fingers.
If the battery is stuck, tap the controller gently against your palm (not a hard surface) or use a soft plastic tool to nudge it free.
5. Inspect The Battery And Compartment
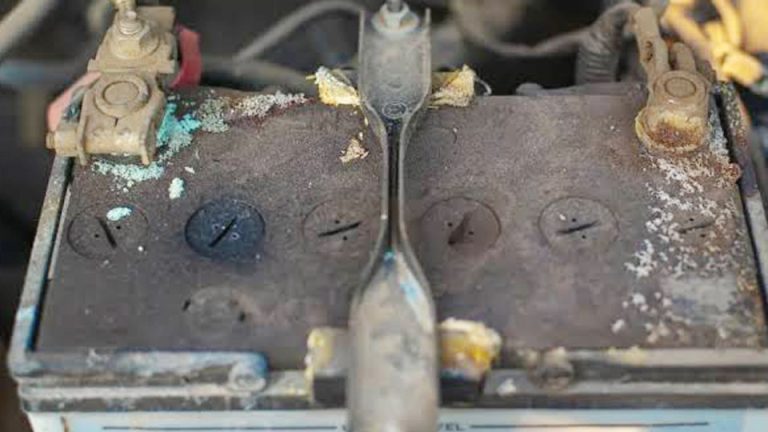
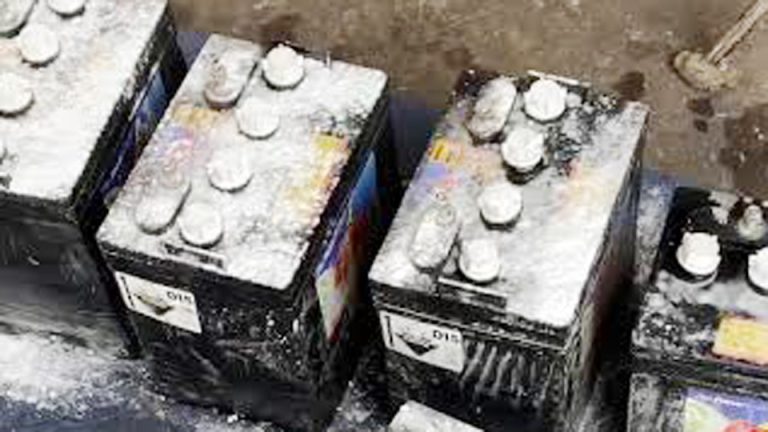
Check the battery for signs of leakage (white or crusty material), swelling, or rust. If you see any of these, dispose of the battery safely and clean the compartment with a dry cloth. Avoid using water or cleaning sprays inside the controller.
Look inside the compartment for dust or debris. Cleaning it now prevents future connection problems.
6. Insert A New Battery Or Leave Empty
If you’re replacing the battery, place a fresh AA battery inside, with the positive (+) end toward the top. Make sure it fits snugly between the contacts. If you’re storing the controller for a long time, leave the compartment empty to avoid leaks.
7. Replace The Battery Cover
Align the cover with the rails on the controller handle. Slide it back into place until it clicks. Do not force the cover—it should move smoothly.
8. Power On And Test
Turn on your Meta Quest 2 headset and test the controller to make sure it works. If you inserted a new battery and the controller does not turn on, check that the battery is placed correctly and that the cover is fully closed.

Credit: www.ifixit.com
Tips For Easier And Safer Battery Removal
Even though the process is simple, a few practical tips can save you time and avoid damage.
- Do not use metal tools. Metal can short-circuit the battery or damage the contacts.
- Replace both batteries together. To avoid confusion, replace the batteries in both controllers at the same time.
- Use good quality batteries. Cheap batteries are more likely to leak.
- Store controllers with batteries out if you won’t use them for weeks.
- Keep the battery compartment clean. A small brush can remove dust and lint.
- Label rechargeable batteries if you use them, so you know which ones are charged.
Troubleshooting: When The Battery Cover Won’t Open
It’s common for the battery cover to feel tight, especially if you’ve never opened it before. Here are some solutions:
- Check for the arrow. Make sure you are pushing in the direction of the arrow.
- Apply steady, even pressure. Quick, sharp movements can break the cover.
- Warm your hands. Cold hands can make it harder to grip the textured surface.
- Don’t use knives or metal pries. These can damage the plastic.
- If stuck, use a soft plastic pry tool. Slide it gently along the edge to lift the cover.
If the cover still won’t move, check for dirt or sticky residue along the seam. Clean with a dry cloth and try again.

Credit: www.eventusrecruitmentgroup.com
What To Do If The Battery Is Leaking Or Corroded
Battery leaks are rare, but they can happen, especially with old or cheap batteries. If you open the compartment and see white, yellow, or crusty powder, or smell a sharp chemical scent, take these steps:
- Do not touch with bare hands. Battery chemicals can irritate your skin.
- Remove the battery carefully using gloves or a tissue.
- Wipe the compartment with a dry cloth or a cotton swab.
- Do not use water or cleaning sprays. They can damage the electronics.
- Let the compartment air dry for several hours before inserting a new battery.
If corrosion is heavy or the controller does not work after cleaning, contact Meta support for advice.
Choosing The Best Batteries For Meta Quest 2 Controllers
Picking the right battery can make a big difference in performance and cost. Here’s a quick comparison:
| Battery Brand | Type | Typical Lifespan (per use) | Recharge Cycles |
|---|---|---|---|
| Duracell | Alkaline | 50 hours | 1 (not rechargeable) |
| Eneloop | NiMH Rechargeable | 35 hours | Up to 2100 |
| Energizer Ultimate Lithium | Lithium | 70 hours | 1 (not rechargeable) |
Non-obvious insight: Many users think rechargeable batteries are always the best, but for the longest playtime per session, lithium AAs win. However, rechargeables like Eneloop are best for saving money and the environment over time.
Another common mistake is mixing old and new batteries or using different brands in each controller. This can cause syncing and power issues.

Credit: www.paddelfestival.de
How Often Should You Replace Batteries?
There is no single answer, since it depends on how much you use your Quest 2. If you play VR games daily, you’ll likely need to replace or recharge batteries every 1–2 weeks. Less frequent users may only need to swap batteries every month.
If you notice any of these signs, it’s time to replace the battery:
- Controller vibrates weakly or not at all
- Tracking feels delayed
- The controller disconnects or is not detected
- You see a low battery warning in VR
It’s a good idea to keep spare AA batteries or a set of charged rechargeables nearby, so you’re never interrupted mid-game.
Can You Use Charging Docks Or Battery Mods?
Some third-party companies sell charging docks or special battery covers with built-in rechargeable packs. While these can be convenient, they come with trade-offs:
- Some docks require you to use their special battery covers, which may not fit as tightly or be as durable as the originals.
- Built-in packs can wear out after a year or two, while regular AA rechargeables last longer.
- Not all mods are officially supported by Meta, so using them may void your warranty.
If you want fast, easy charging, look for well-reviewed docks that use standard AA rechargeables and do not require controller modification.
For more details about battery safety and technology, you can check the Wikipedia page on AA batteries.
Safety Precautions When Handling Batteries
To keep yourself and your controllers safe, follow these guidelines:
- Never mix old and new batteries in the same controller.
- Do not recharge non-rechargeable batteries. Only use a charger with NiMH or Li-ion AA batteries.
- Keep batteries away from water and heat.
- Dispose of old batteries properly. Most supermarkets and electronics stores have recycling bins.
- Store spare batteries in a cool, dry place.
- If a battery leaks, do not use the controller until it is cleaned.
Non-obvious insight: Storing unused batteries in the controller—even if you think you’ll use it “soon”—increases the risk of leaks, especially in hot, humid environments.
Meta Quest 2 Controller Battery Removal: Quick Reference
Here is a fast summary of the steps for battery removal:
| Step | Action | Important Tip |
|---|---|---|
| 1 | Power off headset | Prevents syncing issues |
| 2 | Hold controller with grip up | Find the arrow mark |
| 3 | Slide battery cover down | Do not pry or force |
| 4 | Remove battery gently | Check for leaks |
| 5 | Insert new battery or leave empty | Positive end up |
| 6 | Replace cover | Slide until it clicks |
| 7 | Test controller | Check connection |
Frequently Asked Questions
How Do I Know When My Meta Quest 2 Controller Battery Is Low?
Your Meta Quest 2 headset will show a low battery warning for each controller. You may also notice weaker vibration, slower tracking, or the controller disconnecting during play. These are all signs it is time to replace or recharge the battery.
Can I Use Rechargeable Batteries In My Meta Quest 2 Controllers?
Yes, the controllers support standard NiMH rechargeable AA batteries. Make sure to use a good charger and avoid mixing different battery types. Rechargeable batteries are cost-effective and better for the environment.
What Should I Do If The Battery Cover Is Stuck Or Won’t Open?
If the cover does not slide, double-check you are pushing in the direction of the arrow. Use steady pressure with your thumb, and avoid using sharp or metal tools. If needed, use a soft plastic pry tool to gently loosen the cover.
Warm, dry hands can help grip the surface.
Is It Safe To Leave Batteries In My Controllers When Not In Use?
It’s safe for short periods. If you plan to store your controllers for more than a few weeks, remove the batteries to prevent leaks. This protects the inside of the controller and extends its life.
Are There Risks If I Use Off-brand Or Cheap Batteries?
Cheap or off-brand batteries are more likely to leak, die quickly, or not fit snugly in the compartment. It’s best to use trusted brands like Duracell, Energizer, or Eneloop rechargeables for best performance and safety.
Removing and replacing the batteries in your Meta Quest 2 controllers is easy once you know the steps. By following this guide, you’ll avoid common problems and keep your controllers working smoothly. Always use good batteries, check for leaks, and don’t force the cover.
With a little care, your Meta Quest 2 controllers will last for years of VR adventures.