How to Build a 18650 Lithium Battery Pack With BMS Safely
Building your own battery pack can be exciting until you’re staring at a pile of 18650 cells, a BMS board, and a handful of wires, wondering which connection comes first. I’ve seen plenty of DIY projects go wrong because someone skipped a simple step or assumed all lithium cells could be wired the same way.
If you’re searching for how to build a 18650 lithium battery pack with BMS, you’re already taking the right approach by learning before you start.
A well-built battery pack isn’t just about getting the voltage you need. It has to be safe, balanced, and reliable enough to handle repeated charging and discharging without overheating or damaging the cells.
Choosing the right BMS, matching the cells correctly, and making solid connections all play a big role in the pack’s performance and lifespan.
I’ve built and repaired battery packs for power tools, solar projects, and portable power systems, and I’ve learned that careful planning saves far more time and money than rushing the assembly. A small wiring mistake can shorten battery life or even create a serious safety hazard.
I’ll walk you through the entire process step by step—from selecting compatible 18650 cells and the right BMS to wiring, testing, and charging the finished pack safely. You’ll also learn the common mistakes to avoid so you can build a battery pack that performs well and lasts for years.
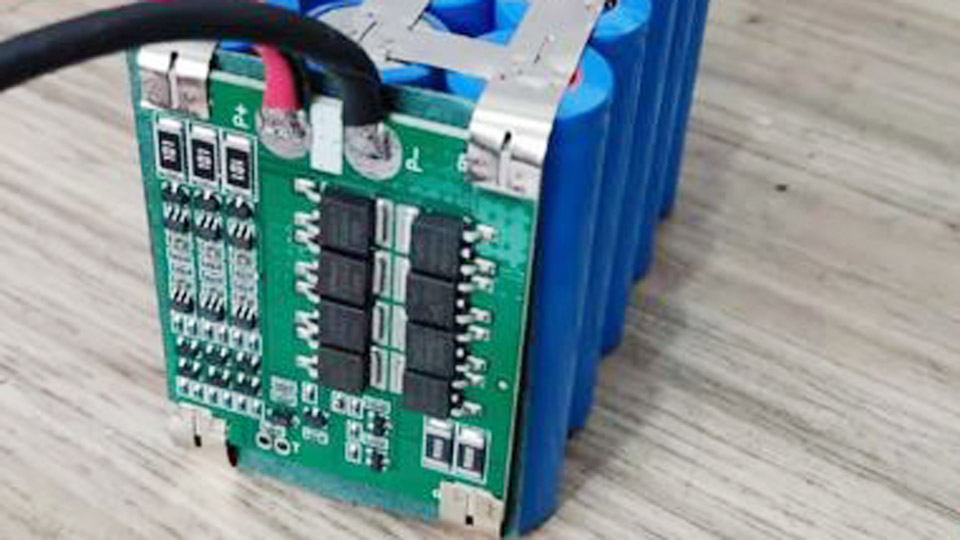
Image by lazada
Why Build Your Own 18650 Pack Instead of Buying Off-the-Shelf?
Factory batteries work fine until they don’t. You pay a premium for proprietary BMS designs, limited configurations, or cells that degrade faster than expected. Building your own lets you match exact voltage and capacity needs—whether that’s a 12V pack for a car audio system, a higher-voltage setup for e-bike conversion, or a modular bank for solar.
18650 cells are everywhere: salvaged from old laptop batteries (with testing), or bought new in matched batches. Pair them with a good Battery Management System (BMS) and you get active protection that off-the-shelf lead-acid or basic lithium packs often lack. The result is longer life, better efficiency, and far lower long-term costs for automotive, solar, UPS, or portable power uses.
Understanding Battery Chemistries: Lead-Acid, AGM, Gel, Lithium-Ion, and LiFePO4
Before jumping into 18650 builds, know your options. Different chemistries suit different jobs.
Lead-Acid (Flooded): These are the old reliable workhorses in cars and basic solar setups. Cheap upfront, but heavy, with only about 50% usable capacity to avoid shortening life. They need maintenance—checking water levels, cleaning terminals—and sulfate if left discharged. Cycle life is typically 300-800 cycles. Great for occasional use where weight doesn’t matter.
AGM (Absorbed Glass Mat): A sealed lead-acid variant. Spill-proof, vibration-resistant, and lower maintenance. Better cold cranking for vehicles. Still limited to ~50% depth of discharge (DoD) for longevity, with 400-1,000 cycles. Heavier than lithium but more forgiving in rough conditions like motorcycles or RVs.
Gel: Similar to AGM but with silica-thickened electrolyte. Excellent for deep-cycle solar or slow-discharge applications. Sensitive to overcharging and high temperatures. DoD around 50%, cycles 500-800. Less common now due to lithium’s rise.
Lithium-Ion (including 18650 NMC/NCA types): High energy density, lightweight, 80-90%+ usable DoD, and 1,000-2,000+ cycles when properly managed. They deliver high current for power tools or EV conversions but need precise BMS protection against overcharge (above ~4.2V per cell), over-discharge (below ~2.5-3.0V), and heat. This is the chemistry for custom 18650 packs.
LiFePO4 (LFP): A safer lithium subset. Nominal 3.2V per cell, very stable, tolerant of abuse, with 3,000-5,000+ cycles and excellent thermal runaway resistance. Slightly lower energy density than standard Li-ion but ideal for solar, marine, and long-term storage. Higher upfront cost but wins on lifetime value.
Pros and Cons Summary (Text Table for Clarity):
- Lead-Acid/AGM/Gel: Low cost, proven in vehicles, heavy, limited DoD/cycles, maintenance for flooded types.
- Lithium-Ion (18650): Lightweight, high performance, needs strong BMS, fire risk if mismanaged.
- LiFePO4: Safest lithium, longest life, slower charge in cold, higher initial price.
For DIY packs, 18650 lithium-ion strikes a great balance for custom voltage/capacity.
Voltage, Capacity, and Pack Math Basics
A single 18650 cell is nominally 3.6-3.7V, fully charged ~4.2V, discharged cutoff ~2.5-3.0V depending on chemistry and load. Capacity is in mAh (milliamp-hours) or Ah—common good cells range 2,000-3,500mAh.
- Series (S): Adds voltage. 3S = ~11.1V nominal (for ~12V systems).
- Parallel (P): Adds capacity. 3P triples Ah while keeping voltage the same.
- A 3S4P pack: 3 cells in series for voltage, 4 such strings in parallel for capacity.
Calculate needs: For a 12V solar system aiming for 100Ah usable, factor DoD and efficiency. Lithium gives you most of the rated capacity. Wh (watt-hours) = V x Ah tells total energy.
What Is a BMS and Why Your Pack Needs One
A Battery Management System (BMS) is the brain and guardian. It monitors individual cell voltages, balances them during charge, cuts off on over-voltage (>4.25V typical), under-voltage, over-current, short circuit, and often temperature. Without it, one weak cell can drag the pack down or cause thermal issues.
Active balancing versions move energy between cells for efficiency. Choose BMS rating matching or exceeding your max continuous discharge (with headroom). For a 20A load, pick at least 30A BMS. Balance wires connect to every series junction.
Step-by-Step: How to Build a 18650 Lithium Battery Pack with BMS
Step 1: Gather Materials and Plan Configuration
Decide voltage/capacity (e.g., 3S for 12V nominal). Source matched 18650 cells—same brand, age, capacity. New cells preferred; salvaged ones need rigorous testing. Tools: spot welder (preferred), nickel strip, multimeter, cell holders/spacers, heat shrink, BMS, charger, safety gear (gloves, glasses, fire extinguisher).
Step 2: Test Every Cell
Never skip this. Measure resting voltage (should be ~3.6-4.0V). Check internal resistance (IR)—lower is better, typically <50-100mOhm for good cells. Capacity test: charge to 4.2V, discharge at 0.5-1A to ~2.8V using a tester. Match cells within 5-10% capacity and 0.05V. Self-discharge test: charge, rest weeks, recheck. Discard swollen, hot, or low performers.
Step 3: Arrange and Connect Cells
Use plastic spacers for alignment and airflow. Spot weld nickel strips for series/parallel connections. Avoid soldering directly to cells—heat damages them. Build series strings first, then parallel. Insulate thoroughly.
Step 4: Install the BMS
Connect balance wires to each series node (B1, B2, etc.). Main B- to pack negative, B+ to positive. Load/charge wires to P- and P+. Double-check polarity—wrong wiring destroys cells instantly.
Step 5: Enclose, Test, and Balance
Shrink wrap or case the pack. Charge slowly with a proper CC/CV lithium charger matched to pack voltage (e.g., 12.6V for 3S). Monitor cell voltages. The BMS handles initial balancing. Test under load for heat, voltage sag, and cutoff behavior.
Start small—build a 2S or 3S2P test pack before scaling.
Safety Considerations: Real Risks and How to Avoid Them
Lithium packs store serious energy. Thermal runaway can lead to fire. Key rules:
- Never mix cells.
- Use proper charger—never lead-acid or NiMH chargers.
- Monitor temperature (<60°C ideal under load).
- Store at 3.6-3.8V per cell, cool and dry.
- Fuse main lines.
- Have a fire-safe area for charging.
- Dispose of damaged cells properly.
Common beginner mistakes: Poor cell matching, undersized BMS, inadequate insulation, ignoring balance wires, or over-discharging. Even pros slip by soldering instead of welding or skipping IR tests.
Charging Methods and Best Practices
Use a dedicated lithium charger with CC/CV profile. For 3S, target 12.6V. BMS protects but charger controls the process. Bulk charge at 0.5C or less for longevity. In solar setups, pair with MPPT controller. For vehicles, ensure alternator/regulator compatibility or use DC-DC converters.
Avoid trickle charging or leaving on incompatible power sources long-term.
Maintenance, Storage, and Troubleshooting
Check voltages periodically. Keep clean and dry. For storage, charge to ~50-60% and check every few months. In cold weather, warm Li-ion packs before heavy use.
Troubleshooting: No power? Check BMS cutoff—balance or charge cells. Swelling? Isolate and replace bad cells. Heat? Check connections and load. Voltage sag? Weak cells or undersized wiring.
Real-World Applications and Examples
- Cars/Motorcycles: Lightweight starter or accessory packs. A 4S pack powers audio without draining the main battery.
- Solar/Off-Grid: 12V or 24V banks with LiFePO4 or 18650 for better efficiency than lead-acid. More usable capacity means smaller footprint.
- UPS/Backup: Fast response and deep cycling.
- Power Tools/Electronics: Custom high-discharge packs outperform stock.
I’ve run 18650 packs in solar sheds for years with minimal degradation when BMS-protected.
Battery Lifespan and Degradation Factors
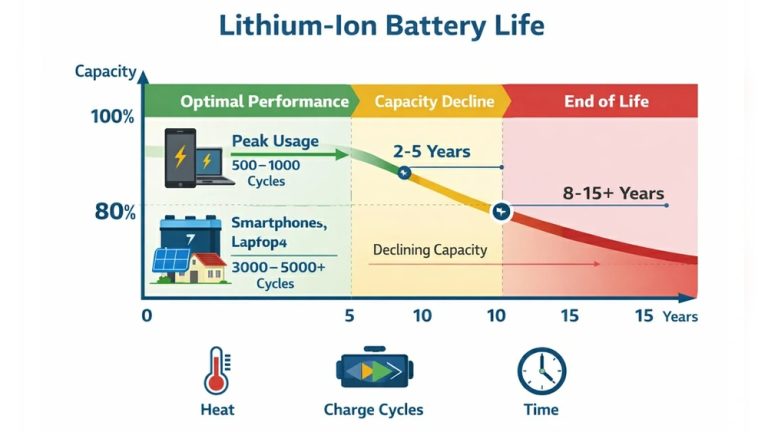
Properly built 18650 packs last 5-10+ years with 1,000-2,000 cycles. Heat, deep discharges, high C-rates, and imbalance accelerate degradation. Store cool, charge moderately, and balance regularly. LiFePO4 versions extend this significantly.
Practical Recommendations and Compatibility Tips
- Match charger to chemistry and voltage.
- Use thick enough wiring for current.
- Consider temperature sensors on advanced BMS.
- For vehicles, ensure BMS handles cranking or vibration.
- Scale gradually and document your builds.
Final Takeaways from the Workshop
Building your own 18650 lithium battery pack with BMS puts you in charge of reliable power for cars, solar, tools, and backups. You’ve seen the chemistries, the critical testing and assembly steps, safety musts, and why a good BMS changes everything.
Common pitfalls—like mismatched cells or wrong charging—become avoidable with experience. You now understand not just the “how,” but the “why” behind choices that keep packs performing for years.
Always add a low-voltage alarm or Bluetooth BMS monitor for real-time cell data. It catches imbalances early, before the main BMS cuts power at an inconvenient moment. That small addition has saved more projects than I can count.
FAQ
What size BMS do I need for my 18650 pack?
Match or exceed your maximum continuous load with 20-50% headroom. For a 30A draw, choose a 40A+ BMS. Factor peak currents too.
Can I use salvaged 18650 cells from laptops?
Yes, but test rigorously for capacity, IR, and self-discharge. Only use matched, healthy ones. Weak cells ruin the pack.
How do I charge a custom 18650 pack safely?
Use a dedicated lithium CC/CV charger set to the correct pack voltage (e.g., 4.2V x number of series cells). Let the BMS handle balancing and protection.
Is it safe to build high-capacity packs at home?
Yes, with proper tools, testing, insulation, and fire precautions. Start small and never bypass safety features.
What’s better for solar: 18650 lithium-ion or LiFePO4?
LiFePO4 for stationary storage due to safety and cycle life. 18650 lithium-ion works well for compact, high-power needs if BMS-protected.