How to Clean the Inside of a Lead Acid Battery Safely
I’ve pulled more than a few car batteries that wouldn’t crank on a cold morning and opened up deep-cycle units from solar setups that had lost half their capacity after a few years of neglect. In most cases, the culprit wasn’t a manufacturing defect — it was buildup on the plates, sediment at the bottom, or corrosion that turned good chemistry into a weak, unreliable power source.
Learning how to clean the inside of a lead acid battery can make a real difference if you’re dealing with a flooded (wet-cell) battery, but it’s not a casual weekend project. It carries real risks, and it’s not something you should attempt on sealed AGM or gel batteries.
I’ll walk you through when it’s worth doing, exactly how I approach it in the garage or on a solar install, the safety steps that keep you from getting burned or blinded, and all the related maintenance that actually prevents you from needing to do this very often.
Whether you’re keeping your truck reliable, your off-grid system running through the night, or your backup UPS ready, the principles are the same.
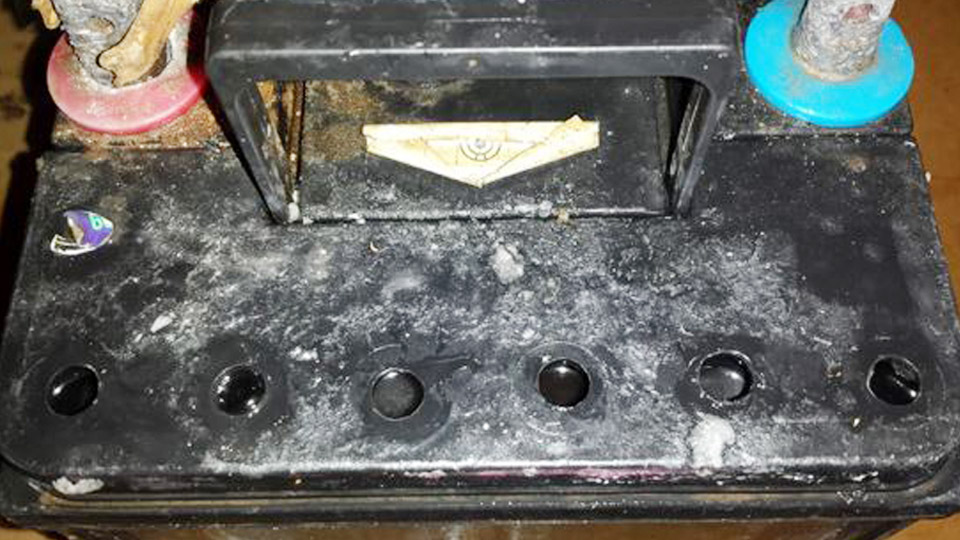
Image by instructables
Understanding Lead-Acid Batteries and Why Internal Cleaning Matters
Lead-acid batteries remain one of the most common and affordable energy storage options for cars, motorcycles, solar arrays, UPS systems, and power tools. A typical 12V flooded lead-acid battery has six cells, each with lead plates (positive lead dioxide, negative sponge lead) immersed in sulfuric acid electrolyte.
Over time, several things happen inside:
Sulfation: Lead sulfate crystals form on the plates, especially during partial discharges or long storage periods. Soft sulfation can sometimes be reversed with proper charging; hard sulfation hardens and blocks capacity.
Sediment buildup: Active material sheds from the plates and collects at the bottom. If it reaches the plates, it causes shorts.
Electrolyte contamination: Impurities or water loss concentrate the acid and accelerate corrosion.
Corrosion and stratification: Acid density varies by depth, and terminals or connections corrode from acid fumes.
Cleaning the inside targets these issues directly but only applies to flooded/wet-cell lead-acid batteries with removable vent caps. AGM (Absorbent Glass Mat) and gel batteries are sealed — attempting to open them destroys them and voids any warranty. Lithium-ion (including LiFePO4) batteries work on entirely different chemistry and never need this kind of internal service.
Real-world impact: A neglected flooded battery in a solar setup might drop from 100+ usable cycles per year to failing after 2–3 years. Proper maintenance, including occasional deep cleaning when justified, can push lifespan toward 5–7 years or more in moderate use.
Battery Types: Which Ones Can You Clean and Why It Matters
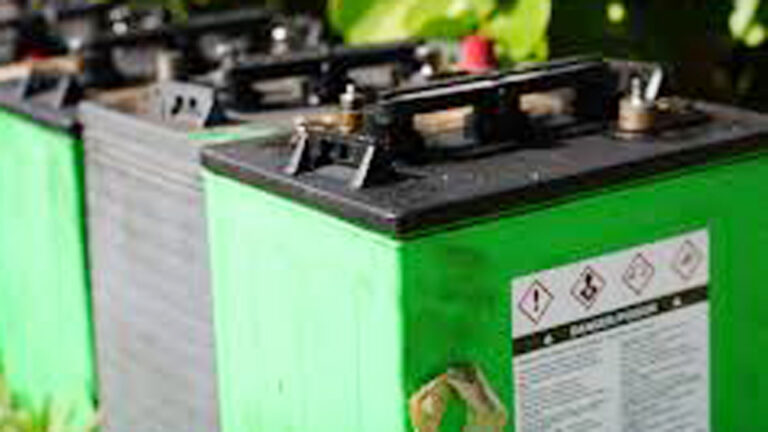
Flooded (Wet-Cell) Lead-Acid:
- Liquid electrolyte you can access.
- Cheapest upfront.
- Requires regular maintenance (water top-ups, cleaning).
- Best for stationary solar, classic cars, or applications where you can check them often.
- Pros: High discharge capability, repairable, tolerant of overcharging if you add water.
- Cons: Spill risk, gassing, needs upright mounting, more maintenance.
AGM:
- Electrolyte absorbed in fiberglass mats.
- Sealed, vibration-resistant, low maintenance.
- Pros: Spill-proof, faster recharge, better cold cranking, longer life in many cycling applications.
- Cons: More expensive, sensitive to overcharging, cannot be opened or “cleaned” internally.
Gel:
- Electrolyte in a silica gel.
- Excellent for deep cycling.
- Pros: Very low gassing, deep discharge tolerant.
- Cons: Slower recharge, sensitive to high charge voltages, higher cost.
Comparison Table (Approximate for 12V 100Ah class batteries):
| Type | Lifespan (cycles) | Maintenance | Cost | Deep Discharge Tolerance | Vibration Resistance | Best For |
|---|---|---|---|---|---|---|
| Flooded | 200–500 | High | Low | Good | Low | Solar, backup, budget |
| AGM | 400–800+ | Low | Medium-High | Good | High | Vehicles, marine, RV |
| Gel | 500–1000+ | Low | High | Excellent | Medium | Deep-cycle solar, wheelchairs |
| LiFePO4 | 2000–5000+ | Very Low | High | Excellent | High | Modern off-grid, EVs |
Choose based on your use case. For a weekend warrior restoring an old car, a flooded battery might be perfect. For a solar cabin you visit infrequently, AGM or lithium makes more sense.
Safety First: Protecting Yourself and Your Battery
Sulfuric acid is corrosive. It can cause severe burns and permanent eye damage. Hydrogen gas produced during charging is explosive. Lead is toxic. Always work in a well-ventilated area, preferably outdoors.
Required PPE:
- Acid-resistant gloves
- Safety goggles or face shield
- Long sleeves and pants
- Apron if available
- Baking soda and plenty of water for neutralization
Never smoke, create sparks, or work near open flames. Have a neutralizing solution (baking soda + water) ready. Dispose of old electrolyte and sludge according to local hazardous waste rules — it’s not regular trash.
Step-by-Step: How to Clean the Inside of a Lead Acid Battery
Only do this on a flooded battery that’s worth saving. If the case is cracked, plates are warped, or capacity is below 60–70% of original, replace it.
Preparation and Testing
Fully charge the battery first using a proper charger. Test voltage and specific gravity with a hydrometer (1.265–1.280 is healthy when fully charged). Note the readings per cell — big differences indicate problems.
Disconnect and Remove
Disconnect negative terminal first. Remove the battery to a safe workspace. Clean the outside with baking soda solution to neutralize surface acid.
Drain the Electrolyte
Remove vent caps carefully. Use a battery acid pump or turkey baster (dedicated tool) to suck out as much electrolyte as possible into a plastic container. Neutralize the old acid later with baking soda.
Flush and Clean
Rinse the cells multiple times with distilled water. Some experienced techs use a mild baking soda solution for the first rinse to neutralize residual acid, then flush thoroughly with distilled water until no fizzing occurs.
Be gentle — you don’t want to disturb plates excessively or create shorts. For heavy sediment, some carefully use a shop vacuum with a non-metallic hose, but this risks damage if you’re not extremely careful.
Inspect the Plates
Look for heavy white sulfate, warped or missing plates, or excessive sludge. If the plates look mostly intact, proceed. Severe sulfation may need chemical desulfation (phosphoric acid or Epsom salt methods in some restoration guides), but results vary.
Refill with Fresh Electrolyte
Use proper battery-grade sulfuric acid diluted to the correct specific gravity (usually 1.265). Never add straight concentrated acid. Fill to the manufacturer’s mark, usually just above the plates.
Recharge and Equalize
Charge slowly with a smart charger. After initial charge, perform an equalization charge (higher voltage, controlled) if your charger supports it to help mix the electrolyte and reduce mild sulfation. Monitor temperature — never let it get too hot.
Final Test
Check voltage, specific gravity, and load test. Expect some capacity recovery, but don’t anticipate miracles on heavily damaged batteries.
This process can take hours to a full day plus charging time. I’ve revived some solar batteries this way that added another 1–2 seasons of service, but others were too far gone.
When You Should (and Shouldn’t) Clean Internally
Do it when:
- Capacity has dropped noticeably but the battery is otherwise physically sound.
- You see heavy sediment or know it sat discharged for months.
- You’re already deep into a restoration project.
Skip it when:
- It’s an AGM, gel, or sealed battery.
- The battery is under warranty.
- You lack proper safety gear or experience.
- Cost of new battery is low compared to your time and risk.
Proper Charging: The Best Prevention
Most internal problems come from poor charging. For a standard 12V flooded lead-acid:
- Bulk/absorption: 14.4–14.8V
- Float: 13.2–13.8V
- Never exceed manufacturer specs.
Use temperature-compensated chargers. Overcharging boils off water and accelerates corrosion. Undercharging leaves the battery sulfated.
Maintenance Routines That Keep You Out of the Cells
- Check electrolyte levels monthly in hot climates or heavy use; top up with distilled water only.
- Clean terminals every 3–6 months with baking soda solution.
- Keep batteries at 50–100% charge; avoid storage below 50%.
- For solar: Use a quality charge controller with equalization function.
- Store in cool, dry places. Extreme heat kills batteries faster than cold.
Common Mistakes Even Pros Make
- Using tap water instead of distilled (minerals cause faster degradation).
- Overfilling cells (leads to overflow and corrosion).
- Mixing old and new batteries in a bank.
- Ignoring temperature effects on charging voltage.
- Assuming a “maintenance-free” label means zero attention (many still need terminal cleaning).
Real-World Examples
In a car or motorcycle, a dirty battery leads to slow cranking and alternator strain. On solar, one weak cell drags down the whole bank and can cause nighttime voltage drops that damage inverters. I’ve seen UPS systems in offices fail during outages because sulfated batteries couldn’t deliver the expected runtime.
Troubleshooting Common Battery Issues
- Won’t hold charge: Likely sulfation or shorted cell. Test specific gravity per cell.
- Low voltage: Undercharging or parasitic drain.
- Overheating: Overcharging or internal short.
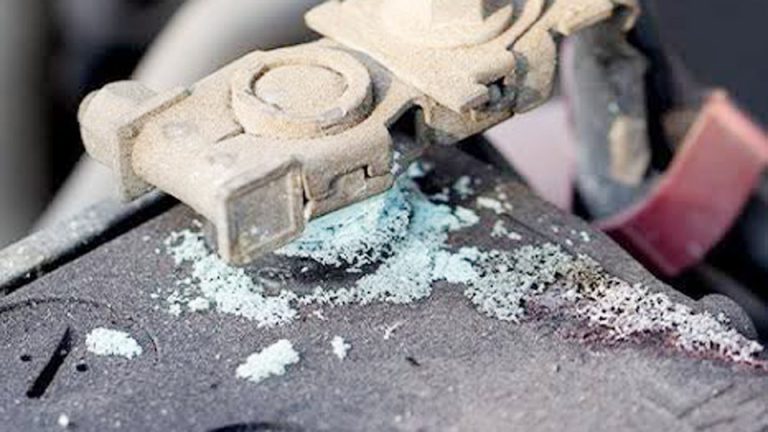
- White powder on terminals: Acid fumes — clean and neutralize.
Practical Recommendations
Match battery type to application. For daily cycling, prioritize deep-cycle ratings (Ah capacity). Use smart chargers with multi-stage profiles. Keep a battery tester or multimeter handy. Rotate batteries in banks. Log maintenance dates.
Lithium-ion note: While not the focus here, LiFePO4 batteries offer far less maintenance and longer life but require compatible chargers and BMS protection. They don’t sulfate or need water, making them ideal upgrades for many solar and off-grid users.
Key Takeaways for Better Battery Management
You now understand the main battery types, their strengths and weaknesses, proper charging voltages, and why internal cleaning is a last-resort tool rather than routine maintenance.
By focusing on prevention — right charger, regular checks, proper storage — you’ll avoid most problems and get maximum life from whatever chemistry you choose.
Invest in a good hydrometer and use it regularly on flooded batteries. Specific gravity tells you more about the true health of each cell than voltage alone ever will. Catch imbalances early and you’ll stay ahead of almost every failure mode.
FAQ
Is it safe to clean the inside of a lead acid battery at home?
Only on flooded batteries, with full PPE, in a well-ventilated area, and if the battery is truly worth saving. The acid is hazardous — if you’re unsure, replace the battery instead.
Can you clean an AGM or sealed lead-acid battery internally?
No. Opening them destroys the design, releases pressure, and usually ruins the battery. Clean only the exterior and terminals.
What’s the best way to remove sulfation without opening the battery?
Use a desulfating smart charger with pulse or equalization modes, keep the battery topped up, and avoid deep discharges. Results vary with how advanced the sulfation is.
How often should I add water or maintain a lead-acid battery?
Check every 1–3 months depending on climate and use. Add distilled water when levels drop. Clean terminals every few months.
When is it better to just buy a new battery?
If testing shows capacity below 70–80% of rated, cells have big specific gravity differences, or the case is damaged. New batteries are often cheaper and more reliable than extensive repairs.