How to Convert RV From Lead Acid to Lithium Safely
Nothing ruins an RV trip faster than waking up to weak batteries, dim lights, or a fridge that stopped running overnight. A lot of RV owners start looking into upgrades after dealing with lead-acid batteries that drain too fast, take forever to charge, or constantly need maintenance.
That’s usually when the question comes up: how to convert RV from lead acid to lithium without damaging the electrical system or wasting money on the wrong setup.
The switch to lithium can completely change how an RV performs off-grid. Longer battery life, faster charging, deeper discharge capacity, and less maintenance are some of the biggest reasons people make the upgrade.
But I’ve also seen plenty of RV owners run into charging problems, incompatible converters, or expensive mistakes simply because they skipped a few important steps.
This conversion is more than just swapping one battery for another. You need to think about charging systems, battery compatibility, safety, wiring, and how your RV actually uses power in real conditions. Getting it right means better reliability and fewer headaches when you’re camping far from hookups.
I’ll walk through the full conversion process in simple terms—from choosing the right lithium battery to checking your converter, charger, and wiring setup. You’ll also learn the common mistakes that cause charging issues and how to avoid them before they turn into costly repairs.
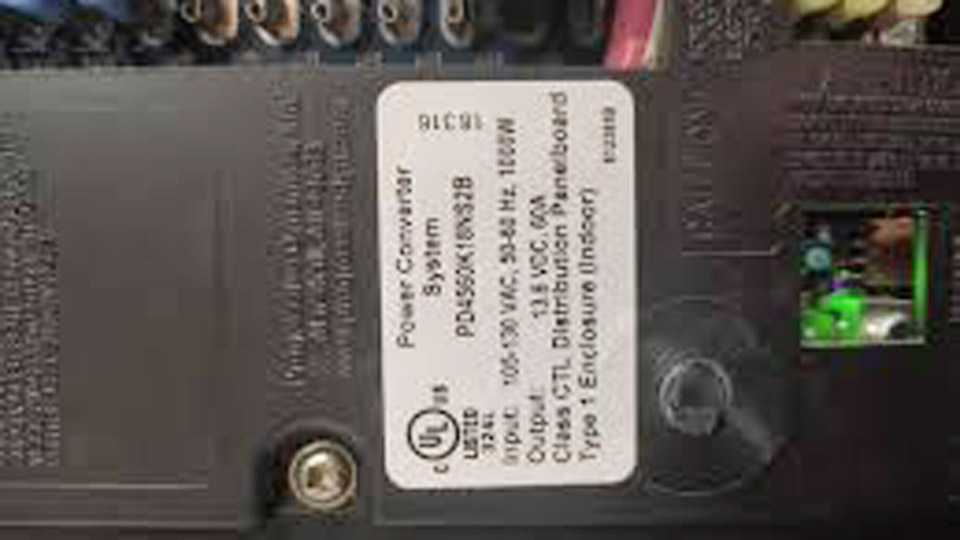
Image by r/GoRVing
Why Make the Switch from Lead-Acid to Lithium in Your RV?
Lead-acid batteries (flooded, AGM, or gel) have served RVers for decades, but they come with limitations that lithium sidesteps nicely.
A typical Group 27 or 31 lead-acid battery might offer 100Ah nominal capacity, but you should only discharge it to about 50% to avoid shortening its life. That gives you roughly 50Ah of usable power.
Lithium LiFePO4 batteries let you safely use 80-95% of their rated capacity without damage. A 100Ah lithium pack effectively replaces 160-200Ah of lead-acid in real-world use.
Weight savings are huge. A 100Ah lead-acid battery often weighs 60-70 lbs; the lithium equivalent is around 25-30 lbs. Drop two or four batteries and you’re suddenly hundreds of pounds lighter—better fuel economy, less tongue weight stress, and easier handling when moving batteries.
Lifespan tells the real story. Quality lead-acid batteries might give 300-800 cycles at 50% depth of discharge. Good LiFePO4 batteries deliver 3,000-5,000+ cycles at 80%+ DoD. Over 10 years of regular use, you often come out ahead on total cost despite higher upfront price.
Other real benefits I’ve seen on the road:
- Stable voltage output (stays above 13V for most of the discharge curve, so appliances and electronics run happier).
- Much faster charging.
- No maintenance—no watering, no corrosion cleanup.
- Better performance in partial state of charge (PSoC) scenarios common in boondocking.
Understanding Battery Types: Lead-Acid vs. LiFePO4
Flooded Lead-Acid: Cheapest upfront. Requires regular maintenance, vents gases, sensitive to vibration and orientation. Prone to sulfation if left discharged.
AGM (Absorbed Glass Mat): Sealed, no maintenance, better vibration resistance than flooded, but still limited to ~50% usable capacity and fewer cycles than lithium.
Gel: Similar to AGM but even more sensitive to charging voltage. Less common in RVs now.
LiFePO4 (Lithium Iron Phosphate): The gold standard for RV house banks. Built-in Battery Management System (BMS) protects against over/under voltage, overcurrent, short circuits, and often low-temperature charging. Chemically stable and safer than other lithium chemistries.
Pros and Cons Comparison
| Aspect | Lead-Acid (Flooded/AGM) | LiFePO4 Lithium |
|---|---|---|
| Usable Capacity | ~50% | 80-95% |
| Weight (100Ah) | 60-70 lbs | 25-30 lbs |
| Cycle Life | 300-800 | 3,000-5,000+ |
| Charge Time | Slow (hours) | Fast (1-3 hours with proper charger) |
| Voltage Stability | Drops steadily | Flat curve until near empty |
| Maintenance | High (water, cleaning) | None |
| Upfront Cost | Lower | Higher |
| Long-Term Cost | Higher due to replacements | Lower |
| Cold Weather | Better tolerance | Needs protection below freezing |
| Safety | Gas venting, acid leaks possible | BMS protection, no venting |
Lithium wins for most full-time or frequent RVers, especially those who boondock or want to minimize hassle.
Planning Your Conversion: Calculate What You Actually Need
Start by assessing your power usage. List everything that runs on 12V: lights, fridge, fans, water pump, inverter loads (if you have one), entertainment systems, etc. Measure or estimate amp draws and daily hours.
Example: A typical weekend boondocker might use 80-150Ah per day. For two days without hookups or solar, you’d want at least 300-400Ah of lithium to stay comfortable with headroom.
Battery Bank Sizing Tips:
- Match physical space—lithium batteries are smaller, so you may fit more capacity.
- Parallel connections for 12V systems (keep cables equal length).
- Series only if building higher voltage banks (24V or 48V with inverter upgrade).
- Consider heated batteries if you camp in cold climates.
Many people replace two Group 31 lead-acids (around 200Ah nominal, ~100Ah usable) with 200-300Ah of lithium and notice a big improvement.
Step-by-Step Guide: How to Convert Your RV from Lead-Acid to Lithium
Step 1: Safety First and Disconnect Everything
Park on level ground, turn off all power sources, disconnect shore power, turn off the generator, and disconnect the negative terminal of your existing batteries first to avoid shorts. Wear gloves and eye protection.
Step 2: Remove Old Batteries
Clean up any corrosion. Dispose of lead-acid batteries properly at a recycling center—they contain hazardous materials.
Step 3: Choose and Install Lithium Batteries
Select reputable brands with strong BMS (Bluetooth monitoring is very handy). Install in the same compartment if it fits, or reconfigure for better weight distribution. Secure them well—lithium packs are lighter but still need to stay put over rough roads. Use proper battery trays or boxes.
Step 4: Upgrade Charging Sources
This is where most DIY mistakes happen.
RV Converter/Charger: Many older units are set for lead-acid (14.4-14.8V absorption). Lithium prefers 14.2-14.6V bulk/absorption and no long float or equalization. Upgrade to a lithium-compatible converter (Progressive Dynamics, WFCO, or similar with Li profile) or one that’s programmable.
DC-DC Charger (Battery to Battery): Essential for alternator charging while driving. Prevents over-stressing your vehicle alternator and provides proper lithium profile. Victron Orion or similar are popular.
Solar Charge Controller: If you have solar, reprogram or replace for lithium voltages. MPPT controllers work great.
Step 5: Wiring and Fusing
Check wire gauge—lithium can accept higher charge currents, so undersized cables overheat. Use appropriate fuses or circuit breakers close to the positive terminal. Ensure good connections; clean terminals and use anti-corrosion grease.
Step 6: Test and Commission
Reconnect everything, charge fully with shore power first. Monitor voltages and temperatures. Run your loads and verify everything works. Use a shunt or battery monitor (like Victron BMV or built-in Bluetooth) for accurate state of charge.
Common Mistakes and How to Avoid Them
I’ve seen these repeatedly:
- Leaving the old lead-acid charger in place → Undercharging or damaging the BMS.
- Undersized wiring or missing fuses → Melted cables or fire risk.
- No low-temperature protection → Charging below 32°F (0°C) damages cells (use heated batteries or a charger with temp cutoff).
- Overlooking alternator charging → Can cook your alternator without a proper DC-DC charger.
- Mixing old and new batteries → Never do this.
- Ignoring BMS warnings or Bluetooth monitoring.
Take your time with planning. If you’re not comfortable with electrical work, hire an RV tech experienced with lithium conversions.
Charging Methods and Best Practices
LiFePO4 likes constant current/constant voltage (CC/CV) charging. Ideal absorption around 14.4V, then stop or drop to a mild float (13.5-13.6V). Many BMS units handle balancing automatically during charge.
Recommended Charge Rates: 0.2C to 0.5C (20-50A for a 100Ah battery). Higher is possible with premium packs but generates more heat.
Store at 50-70% charge in moderate temperatures. They handle partial charges far better than lead-acid.
Safety Considerations
Lithium is safe when respected. The BMS is your primary safeguard. Install smoke/heat detectors in the battery compartment. Ventilate if needed (though LiFePO4 doesn’t off-gas like lead-acid). Never use as engine starting batteries unless the pack is specifically rated for high cranking amps.
Real-World Usage Examples
In my experience, a couple with a 25-foot travel trailer who boondocks on weekends went from struggling with two AGMs to 300Ah lithium plus 400W solar. They run a residential fridge, CPAP, lights, and fans for days without worry.
Full-timers in Class C motorhomes often pair 400-600Ah lithium with inverters for air conditioning or microwave use off-grid. Solar + lithium is a fantastic combo for dry camping.
Maintenance and Longevity Tips
Lithium needs almost none, but:
- Keep terminals clean and tight.
- Monitor via Bluetooth for cell balance and temperature.
- Avoid extreme discharges regularly.
- Update firmware on smart batteries if available.
- Test your system seasonally.
Conclusion: A Smarter Power Setup for Your RV
Switching your RV house batteries to lithium delivers lighter weight, more usable power, faster recharges, and years of reliable service when you address the supporting systems properly. You’ll spend less time maintaining batteries and more time enjoying the road.
The key takeaway? Plan the entire charging ecosystem—batteries, converter, DC-DC charger, wiring, and monitoring. Do it once and do it right.
Always install a quality battery monitor/shunt right at the start. Knowing exact state of charge in real time prevents surprises and teaches you your actual consumption patterns faster than anything else. Many experienced techs consider this non-negotiable on lithium setups.
FAQ
How much does it cost to convert an RV from lead-acid to lithium?
Expect $1,000-$3,000+ depending on capacity and components needed. Batteries are the biggest chunk, followed by charger upgrades and wiring. Factor in longevity and you often break even or save money over 5-7 years.
Can I just drop in lithium batteries without changing anything?
Sometimes, if your converter happens to output the right voltage, but it’s risky. Most setups need at least a DC-DC charger and often a new converter for best performance and safety.
Do lithium RV batteries work in cold weather?
They perform well but shouldn’t be charged below freezing. Choose self-heating models or add a charger with temperature protection for cold climates.
How long do lithium RV batteries last?
Quality LiFePO4 packs commonly last 8-15 years or 3,000-5,000 cycles with proper care—far longer than lead-acid.
Is it worth converting if I mostly camp with hookups?
Still yes for many people due to weight savings, no maintenance, and reliability. The benefits shine brightest for boondockers, but even hookup campers appreciate never worrying about dead batteries after a few days of storage.