How to Disconnect a MacBook Air Battery Safely
Whether you’re replacing a swollen battery, upgrading an internal component, or troubleshooting a MacBook that won’t power on, one of the first things you’ll need to do is how to disconnect a MacBook Air battery safely.
It might seem like a simple step, but I’ve seen plenty of avoidable mistakes—from damaged connectors to accidental short circuits—simply because someone rushed the process.
Working inside a MacBook Air isn’t the same as repairing older laptops with removable batteries. The battery is built into the chassis, and the connector is small, delicate, and surrounded by other sensitive components. Using the wrong tool or applying too much force can turn a straightforward repair into an expensive one.
Taking a few extra minutes to disconnect the battery correctly protects both you and your MacBook. It reduces the risk of electrical damage, helps prevent accidental component failures, and creates a safer environment for any repair or maintenance task that follows.
I’ll show you the exact steps I use to disconnect a MacBook Air battery safely, explain which tools make the job easier, and point out the common mistakes that can damage the battery connector or logic board. By the end, you’ll be ready to work on your MacBook with far more confidence.
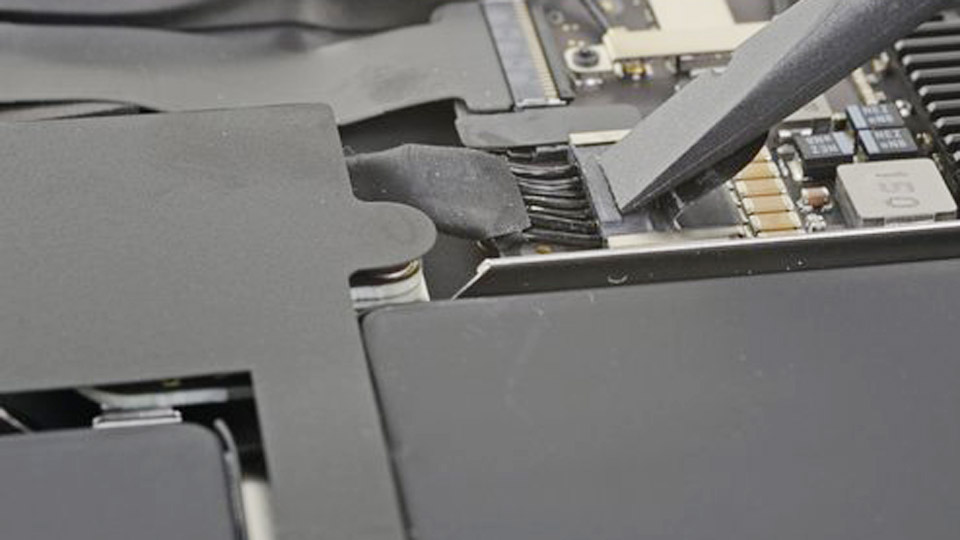
Image by ifixit
Why Disconnecting the Battery Matters in Real Scenarios
Batteries fail at the worst times. A MacBook Air battery might swell from heat cycling, push against the trackpad, or cause random shutdowns. In vehicles, a faulty connection leads to no-starts. In solar setups, poor isolation during maintenance risks shorts or fires.
Disconnecting isolates the power source. For the MacBook Air, it prevents accidental shorts while you work inside, resets certain diagnostics, and lets you safely replace or inspect the pack. I’ve seen beginners skip this and fry components—don’t be that person.
Safety first: Lithium-ion batteries in MacBooks (and many modern devices) can release energy suddenly if mishandled. Work on a non-static surface, use proper tools, and discharge the battery below 25% if possible before opening.
Tools You’ll Need for MacBook Air Battery Work
- P5 pentalobe screwdriver (for bottom case screws)
- T5 or Torx bits for internal screws
- Plastic spudger or opening tool (never metal near cells)
- Tweezers for tabs and connectors
- Isopropyl alcohol (90%+) for cleaning
- Anti-static wrist strap (optional but smart)
- Replacement battery if swapping (match model exactly)
Models vary slightly—2018 and later use adhesive pull-tabs, while older ones rely more on screws. Always check your exact year.
Step-by-Step: How to Disconnect MacBook Air Battery
Power Down and Prepare
Shut down your MacBook completely. Flip it over on a soft cloth. Remove any external power.
Remove the Bottom Case
Use the P5 pentalobe driver to remove the screws (usually 8-10 depending on model). Keep them organized—some are longer. Gently pry the case starting from the rear vents. Lift carefully; clips hold it snug.
Locate and Disconnect the Battery Connector
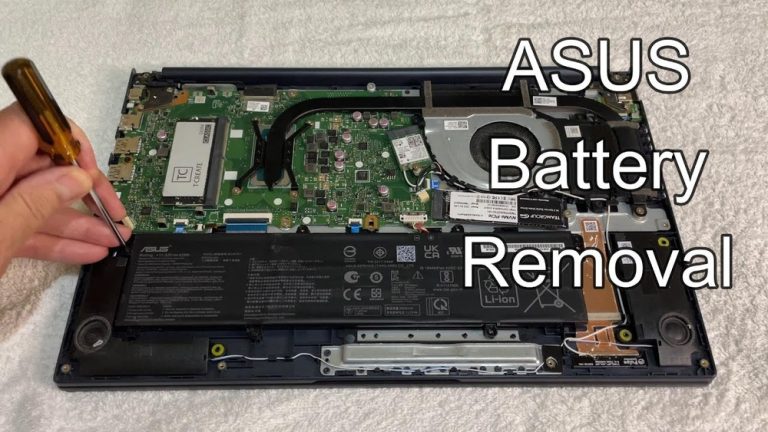
Inside, you’ll see the battery pack, often on the right or spanning much of the chassis. Find the battery connector on the logic board—it’s a small rectangular plug, sometimes covered by tape.
Peel back any adhesive tape gently.
Use a spudger to slide the connector parallel to the board (not upward) to unplug it. Pull steadily but lightly. This is the critical “disconnect” step that powers down the system internally.
Handle Adhesive (Newer Models)
For 2018+, batteries use stretch-release adhesive strips with pull tabs. Peel back the black tabs and pull slowly and evenly, parallel to the battery. If one breaks, use dental floss or fishing line with patience and heat (low hairdryer) to soften glue. Do not pry the cells aggressively.
Remove Screws Holding the Battery
Unscrew the retaining screws (often 5-10). Note lengths—two are usually longer. Lift the battery carefully by edges, avoiding flexing or puncturing cells.
Reassembly is reverse: reconnect firmly, replace screws in original spots, snap the case, and test.
Pro Tip from Experience: After reconnecting, hold the power button for 10-15 seconds before booting to discharge residual power. Run Apple Diagnostics (hold D at startup) to verify.
Common mistake: Forcing the connector upward instead of sliding it. This damages pins on the logic board. Another: Losing track of screw positions, leading to uneven pressure or stripped threads.
Understanding Lithium-Ion Batteries Like Those in Your MacBook
MacBook Air batteries are lithium-polymer or similar lithium-ion variants. They offer high energy density in a thin package but degrade over 300-1000 cycles depending on usage.
Key specs: Nominal voltage around 3.7-3.8V per cell, packs assembled in series/parallel for ~11-15V total. Capacity in Wh (watt-hours) tells runtime better than mAh.
Degradation Happens Because: Heat, deep discharges below 20%, constant 100% charge, and age. Real-world: A 4-year-old MacBook Air often drops to 70-80% health.
Broader Battery Types: What Fits Your Needs
Batteries aren’t one-size-fits-all. Here’s a practical breakdown:
Lead-Acid (Flooded): Traditional car batteries. Cheap upfront, heavy, need maintenance (distilled water top-ups). Good for high cranking amps (CCA) in cold starts. Prone to sulfation if left discharged.
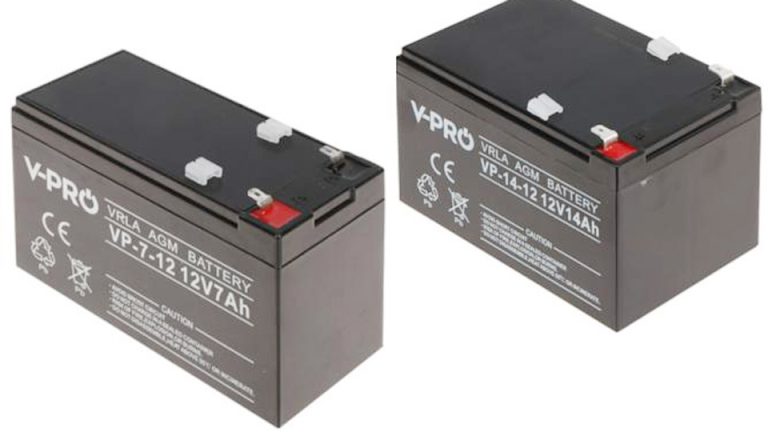
AGM (Absorbed Glass Mat): Sealed lead-acid variant. Vibration-resistant, no spills, faster recharge. Excellent for motorcycles, RVs, and audio systems with high draw. More expensive than flooded but longer life in deep-cycle use.
Gel: Similar to AGM but uses gel electrolyte. Sensitive to overcharging; best for solar where steady low current applies. Less common now.
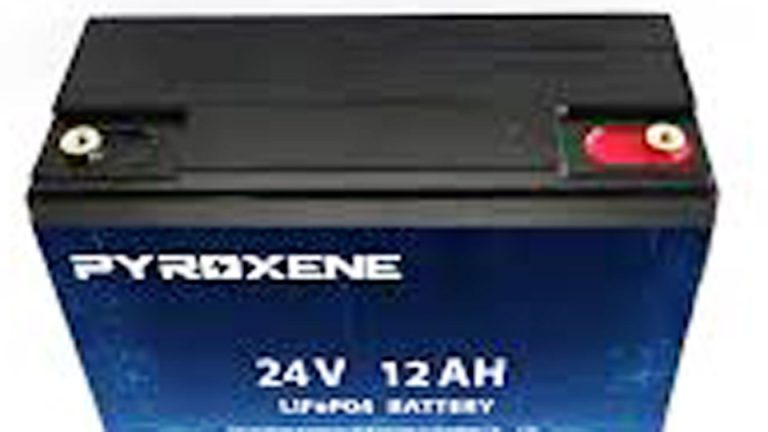
Lithium-Ion (Li-ion) and LiFePO4: Lightweight, high cycle life (2000+), efficient. LiFePO4 is safer (less thermal runaway risk), stable voltage, ideal for solar, EVs, and marine. MacBook-style lithium is optimized for slimness and power density.
Comparison Table (Real-World Metrics):
- Lifespan/Cycles: Flooded Lead-Acid: 200-500; AGM: 400-800; LiFePO4: 2000-5000+; Laptop Li-ion: 300-1000.
- Weight: Lithium half or less of lead-acid equivalents.
- Cost: Lead-acid cheaper initially; lithium wins long-term (fewer replacements).
- Maintenance: Lead-acid needs checking; lithium mostly hands-off.
- Temperature Tolerance: Lithium better in extremes but avoid charging below freezing.
- Safety: LiFePO4 safest; all lithium needs BMS (battery management system) protection.
Pros/Cons Summary:
- Lead-acid family: Affordable, proven, but heavy and less efficient.
- Lithium: Expensive upfront, but lighter, longer-lasting, better for renewable storage and portable use. In solar, LiFePO4 handles daily cycling without the 50% depth-of-discharge limit of lead-acid.
Charging Methods and Best Practices
Wrong charging kills batteries fast. Use a charger matched to chemistry and voltage.
- Lead-Acid/AGM: Multi-stage (bulk, absorption, float). Avoid cheap trickle chargers that overcharge.
- Lithium: CC/CV (constant current/constant voltage). MacBooks handle this internally, but for external packs, use a proper BMS-protected charger.
- Voltage Ranges: 12V systems—lead-acid charge to 14.4-14.8V absorption; lithium around 14.2-14.6V max for 12V nominal. Never mix.
Real mistake: Leaving a lead-acid on a basic maintainer for months—sulfation sneaks up. Or overcharging lithium without protection.
Practical Charging Tips:
- For laptops/MacBooks: Keep between 20-80% when possible for longevity. Many modern systems let you set charge limits.
- Cars: Drive regularly or use a smart maintainer.
- Solar: Size your charge controller properly (MPPT preferred) and monitor with a shunt or Bluetooth BMS.
- Storage: 40-50% charge, cool dry place (50-70°F ideal). Check every 3-6 months.
Battery Maintenance Routines That Actually Work
In the garage or off-grid setup, consistency beats perfection.
- Testing: Use a multimeter for voltage. Load tester for cranking batteries. Apps like coconutBattery for Mac health.
- Cleaning: Corrosion on terminals? Baking soda + water neutralize, then dielectric grease.
- Vehicles/Motorcycles: Check every oil change. Tight connections prevent voltage drops.
- Solar/UPS: Equalize lead-acid occasionally; balance lithium cells via BMS.
- Power Tools/Electronics: Avoid full depletion. Store at mid-charge.
I’ve seen flooded batteries last 7+ years with distilled water top-ups and avoiding winter discharge. Lithium packs in RVs fail early from poor ventilation or mismatched chargers.
Troubleshooting Common Issues
- MacBook Won’t Charge: After disconnect/reconnect, SMC reset (specific key combo per model).
- Swollen Battery: Stop using immediately—risk of damage. Replace promptly.
- Car No-Start: Test alternator output (13.5-14.5V running). Parasitic drain test with multimeter.
- Solar Bank Not Holding: Check for imbalance, shading, or sulfation.
Safety risks: Overheating (ventilate), leakage (neutralize acid), or puncture (fire hazard with lithium).
Real-World Examples Across Applications
- Cars/Motorcycles: AGM or lithium for reliability in vibration-heavy environments. One friend switched his truck to lithium—halved weight, instant cranking.
- Solar/Off-Grid: LiFePO4 banks with good inverters transformed his cabin—no more generator noise.
- UPS/Backup: AGM for cost-effective short bursts; lithium for longer runtime.
- Electronics: Like your MacBook—calibrate occasionally by full discharge/recharge, but not monthly.
Choosing the Right Battery for Your Setup
Match capacity (Ah or Wh) to load. For MacBook replacement, buy OEM-quality or reputable third-party with warranty. In vehicles, check CCA/RC ratings. Solar: Prioritize depth of discharge and cycle life.
Compatibility: Voltage must match system. Parallel same chemistry and age. Series for higher voltage.
Key Takeaways for Confident Battery Management
You’ve now got the hands-on steps for disconnecting a MacBook Air battery plus the broader framework that applies to cars, solar, tools, and more.
Understanding types, proper charging (right voltage/current), avoiding deep drains or constant full charge, and routine checks prevents most failures.
A technician’s pro tip: Always label your battery cables and take photos before disassembly. It saves hours on reassembly and prevents crossed polarity disasters that destroy expensive electronics.
FAQ
How do I know if my MacBook Air battery needs replacement?
Check System Settings > Battery for health percentage. Below 80% or noticeable swelling, rapid drain, or heat means time. Run diagnostics for confirmation.
Is it safe to disconnect the MacBook battery myself?
Yes, with care and right tools. Follow model-specific guides. Disconnecting prevents shorts, but if unsure, visit an authorized service—lithium cells can be hazardous if punctured.
What’s the best way to store a lithium battery long-term?
Charge to ~50%, cool dry location, check every few months. Avoid full discharge or extreme temps.
Can I use a car charger on a deep-cycle battery?
Only if it’s smart/multi-stage and matched to chemistry. Lithium needs specific profiles—mismatch causes damage or fire risk.
How long do solar lithium batteries really last?
With proper use (avoiding extremes), 8-15 years or 3000-5000 cycles. Far better than lead-acid in daily cycling.